
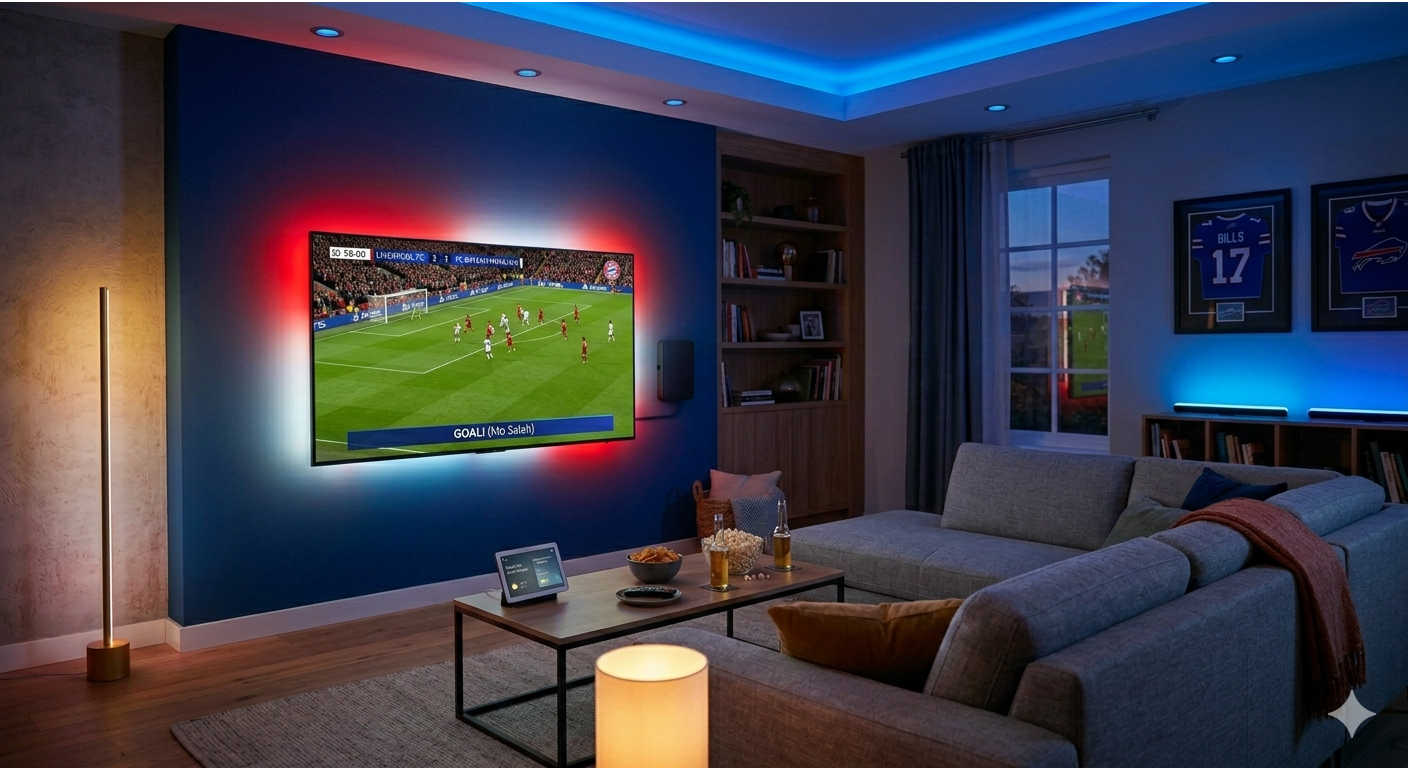
Most sports fans put serious thought into their TV size, sound system, and seating. Lighting? That usually gets treated as an afterthought — flip the switch, find the couch, done.
But here’s the thing: lighting quietly shapes your entire watching experience. It affects how vivid your screen looks, how tired your eyes feel after 90 minutes, how much atmosphere fills the room, and whether your guests feel like they’re watching a match or sitting through a PowerPoint presentation.
Getting your smart home lighting right for sports watching isn’t complicated, and it doesn’t require spending a fortune. This guide walks you through everything from choosing the right gear to programming match-day routines — in plain language, without any unnecessary fluff.
What Standard Lighting Gets Wrong for Sports Watching
Before talking about solutions, it’s worth understanding why the default lighting setup in most living rooms is a poor fit for watching sports.
Glare ruins screen contrast. Overhead lights or a floor lamp positioned anywhere in the same visual field as your TV will cast reflections on the screen. This kills contrast, flattens the picture, and becomes particularly noticeable on OLED and QLED panels that are otherwise capable of stunning blacks.
A dark room is harder on your eyes than you think. Watching a bright screen in complete darkness forces your eyes to constantly re-adapt between the dim surroundings and the bright display. Over a long match — or a double-header — this leads to real fatigue: headache, dryness, and that heavy-eyed feeling by the second half.
White overhead light has zero atmosphere. Flat, cool-white ceiling lighting makes a living room feel functional rather than exciting. It’s the difference between watching a match in a waiting room versus in a proper fan space. The lighting environment shapes mood more than most people realize.
Manual adjustments during play are genuinely annoying. Getting up to dim the lights at kick-off, turn them back up at halftime, or adjust for a night match — with traditional fixtures, all of that requires physical effort. Smart lighting makes these transitions automatic.
Smart Lighting vs Regular Lighting: What Actually Changes?
Smart lighting is simply controllable lighting. Instead of a fixed brightness and color, smart bulbs and strips let you adjust warmth, color, and intensity — via an app, a voice command, or a pre-programmed schedule.
For sports watching specifically, this opens up a few things that aren’t possible with conventional lighting:
Dynamic color. You can set the room to your team’s colors before kick-off, switch to a rival’s colors as a joke at halftime, or let a sync system mirror whatever colors are on screen — green for the pitch, red for a goal celebration animation.
Precise dimming. Rather than choosing between “on” and “off,” smart bulbs let you dial brightness to exactly where it needs to be: dim enough to reduce glare, bright enough that the room doesn’t feel like a cave.
Automation. Set a routine that dims the lights at 7:50 PM every Saturday, activates your match-day scene, and brightens again at halftime — without you touching anything.
Voice control. Calling out “Alexa, game mode” while your hands are full of nachos is genuinely useful.
The practical difference between a well-configured smart lighting setup and standard lamps is significant. The room feels purpose-built for the occasion.
The Best Smart Lighting Products for Sports Fans
You don’t need to rewire anything or hire an electrician. Every product mentioned here is consumer-grade and fits into existing fixtures.
Smart Bulbs
Smart bulbs screw into your standard lamp or ceiling fixture and replace dumb bulbs with color-adjustable, app-controlled ones.
Philips Hue White and Color Ambiance (A19/E27) is the benchmark. Colors are accurate, the app is well-designed, and the Zigbee-based connection is rock-solid even in busy wireless environments. It requires a Bridge (hub), but that reliability justifies the investment if you’re building a permanent setup.
LIFX A60 skips the hub and connects directly over Wi-Fi. Colors are vivid and bright — genuinely impressive output. It’s a solid pick if you want simpler setup and already have reliable home Wi-Fi.
Govee Smart Bulbs are the entry-level choice. Color range and app control are better than you’d expect at the price point. They work fine for basic team color scenes, though they lack the ecosystem depth of Hue.
LED Light Strips
Strips go behind the TV, under furniture, along shelves, or around the perimeter of a room for ambient accent lighting.
Govee TV Backlight 3 with Camera uses a small camera mounted to your TV to capture on-screen colors 60 times per second, then mirrors those colors to strips attached to the TV’s rear panel. At under $60 for a complete kit, this is one of the best value purchases available for home theater enthusiasts.
Philips Hue Play Gradient Lightstrip is the premium option. It attaches to the back of the TV and can display multiple different colors along a single strip simultaneously — so the left side glows green while the right side shifts amber, matching the screen gradient. Best suited for OLED or QLED TVs where picture quality justifies the investment.
Govee Immersion TV LED Backlights offer similar camera-based screen sync at a lower price and are compatible with virtually any TV size.
Nanoleaf Lines or Shapes are modular light panels that mount to the wall. They work well as accent lighting on a side wall next to the TV, adding visual texture to the room that ordinary strip lights can’t provide.
Smart Plugs and Dimmers
If a full smart bulb upgrade isn’t practical right now, a smart plug turns any existing lamp into a voice-controllable, schedule-capable light source. You won’t get color control, but you do get automation — which accounts for a meaningful chunk of the smart lighting benefit.
How to Set Up TV Bias Lighting Step by Step
Bias lighting is a strip of light mounted to the rear of your TV, aimed at the wall behind it. It creates a soft glow that raises the ambient brightness in your immediate viewing zone — without adding glare to the screen itself.
Display professionals recommend it because the contrast between a bright TV and a dark wall is where most of the visual fatigue in long viewing sessions comes from. Narrowing that contrast gap takes meaningful strain off your eyes.
Here’s how to set it up properly.
Step 1 — Pick your strip. For basic bias lighting, any white LED strip rated for your TV size works. For color-reactive bias lighting that mirrors the on-screen content, go with the Govee TV Backlight kit or the Philips Hue Gradient Lightstrip.
Step 2 — Measure your TV perimeter. Bias light kits come in sizes matched to common TV dimensions (55″, 65″, 75″). If you’re buying a generic strip, measure the full perimeter and add about 15% for corners and overlap.
Step 3 — Attach the strip to the rear panel. Use the included adhesive backing. Position the strip 1–2 inches inward from the TV’s outer edge, centered on each side. The goal is to have the LEDs facing outward toward the wall — not inward toward the screen.
Step 4 — Set brightness and color. For neutral bias lighting aimed at reducing fatigue, set the color temperature to around 6500K (daylight white) and brightness to roughly 10–15% of your TV’s peak output. This specific brightness-to-screen ratio is what makes bias lighting effective rather than distracting.
Step 5 — Enable screen sync if applicable. If you’re using the Govee camera kit, mount the camera at the top center of the TV, run the calibration in the app, and switch to Video Mode. For the Philips Hue system, this requires an HDMI Sync Box (covered in a later section).
Reducing Eye Strain During Long Matches
A three-hour Premier League match, a Test cricket session, an NBA double-header — sustained screen watching puts real demands on your visual system. Smart lighting helps in three specific ways.
Bias lighting bridges the brightness gap. As covered above, the single most effective thing you can do is install a backlight behind your TV. It reduces the perceived contrast between the screen and the wall, which is where most of the tiredness originates.
Dynamic ambient sync reduces abrupt transitions. When the ambient light in a room subtly shifts to match what’s on screen — a soft green during pitch play, brighter whites during scoreboard graphics, warmer tones during studio analysis — your eyes don’t have to work as hard to re-adapt between the screen and the surrounding environment. Products like the Govee TV Backlight and Philips Hue Sync Box handle this automatically.
Warmer light in the evening matters. For late kick-offs or night fixtures, shifting your bulbs to warm amber tones (around 2200–2700K) is a meaningful change. Cool, blue-heavy light from standard bulbs signals wakefulness to your brain. Warmer tones are gentler on the eyes and cause far less disruption to sleep if you’re watching past 9 or 10 PM.
A simple rule of thumb: daytime matches benefit from cooler, neutral light (4000–5000K). Evening matches are better served by warm light (2700–3000K) kept at lower intensity.
Setting Up Team Color Scenes
This is where smart lighting genuinely becomes fun. Setting your entire room to your team’s exact brand colors before a big match adds something to the occasion that’s hard to describe until you’ve experienced it.
Every major smart lighting app supports custom color scenes. Here’s how to create one.
In the Philips Hue app: Go to Lights or Rooms, tap the relevant group, select Create Scene, choose Custom, and enter your team’s hex color code. Every major club’s brand colors are publicly listed — Liverpool red is #C8102E, Barcelona blue is #004D98, Manchester City sky blue is #6CABDD. Save the scene with a name you’ll remember and assign it a shortcut.
In the Govee Home app: Select your devices, tap Scenes, then DIY, then Create. Choose Static Color mode, dial in the hex code, save it, and pin it to your app home screen for one-tap activation.
With Google Home or Alexa: Once your scenes are saved in the manufacturer’s app and linked to your smart home account, you can activate them by voice. Something like “Hey Google, turn on Arsenal mode” works once the scene is named and linked.
One practical tip worth mentioning: create a second scene for rival colors if you’re often hosting guests who support other clubs. Switching between home and away atmospheres mid-match becomes a minor occasion in itself.
Syncing Lights to Your Screen in Real Time
Real-time screen sync is the most immersive feature in consumer smart lighting today. When it works well, the ambient light around your TV mirrors the game being played — shifting, pulsing, and changing color with every moment. It’s difficult to convey in words how much this changes the feel of watching live sports.
There are two methods available at different price points.
Camera-Based Screen Sync
A small camera clips to the top of your TV and continuously reads what’s on screen. The system translates that data into matching colors for the LED strip on the back of the TV, updating fast enough (typically 60 times per second) to feel genuinely responsive.
Govee TV Backlight 3 with Camera is the leading product in this category for everyday budgets. Setup takes about 15 minutes, the app calibration process is straightforward, and the result is impressive. One caveat: the camera occasionally needs re-calibration if the TV is moved or if ambient light levels change significantly.
This method works with any TV, any input source, and any streaming service — because it reads the picture directly, it doesn’t care where the signal comes from.
HDMI Sync Box
The Philips Hue Play HDMI Sync Box sits between your HDMI source (streaming stick, set-top box, games console) and the TV. It reads the video signal before it reaches the screen and uses that data to control not just the TV backlight but every Hue light in the room — at near-zero latency.
The practical advantage over camera-based sync is accuracy and speed. Colors are more precisely matched, the response is faster, and the system can control floor lamps, ceiling lights, and light bars positioned around the room — not just the TV strip.
The tradeoff is cost. The Sync Box itself runs around $330-$385, on top of whatever Hue lights you already own. It’s a premium solution, but for a dedicated viewing room, the result is genuinely remarkable.
Room Setup: Where to Place Your Lights
Placement determines how effective your lighting setup actually is. Here’s what works well in each type of space.
Standard Living Room
This is where most people will be setting up, and a few well-placed fixtures go a long way.
The TV backlight strip is non-negotiable — it does more work than any other single item. Add one or two Hue Play light bars positioned on either side of the TV stand, pointing toward the wall behind the screen. These extend the ambient halo effect into the broader room without creating glare.
For the overhead light, a smart bulb in the main ceiling fixture gives you dimming and color control. Keep it at 20–30% brightness during play in team colors, and up to 70% neutral white during halftime. That alone gives the room a completely different feel between playing periods.
If you have a floor lamp in the corner, a smart bulb there adds depth. It fills the lower portion of the room with light, which reduces the shadow contrast around the TV area and makes long viewing sessions more comfortable.
Dedicated Media Room or Man Cave
A dedicated room gives you far more control because you’re not sharing the space with daytime activities.
LED cove lighting around the ceiling perimeter creates a stadium-glow effect when set to team colors and dimmed low. Nanoleaf panels on a side wall add visual texture and react dynamically with on-screen content if connected to a sync system. Under-seat or under-sofa LED strips at floor level add depth to the space without creating any direct glare path to the screen.
In a dedicated space, keep overhead lighting either off entirely during play or reduced to a very low warm setting. The cove and accent lighting carries the atmosphere.
Multi-Use Space
If your viewing area doubles as a dining room or open-plan kitchen, smart lighting becomes even more valuable because it lets you transform the same space for different purposes. A match-day scene activates at kick-off; a dinner scene comes on at halftime. The physical furniture doesn’t move, but the room genuinely feels different.
Automating Your Match-Day Lighting Routine
The real value of smart lighting over time isn’t the individual features — it’s automation. Once your routines are set up, the lights respond to the match schedule without requiring any manual input.
Pre-Match Routine
Set a routine to trigger 10–15 minutes before scheduled kick-off:
- Overhead lights dim to 35–40%
- Team color scene activates across all linked lights
- TV backlight strip turns on at medium intensity
- (Optional) A phone notification reminds you the match is starting
Both the Philips Hue app and Google Home support time-based automations. In Hue, this is under Routines → At a Specific Time. In Google Home, it’s under Automations → Add a Starter → At a Scheduled Time.
Halftime Routine
Halftime is a practical window — people move around, grab food and drinks, and the room needs to function normally again. A halftime scene at 65–70% neutral white makes the space feel normal without requiring anyone to touch a switch.
The simplest trigger for halftime is a voice command: “Hey Google, halftime” or “Alexa, lights up” — which you configure to activate a specific scene. This is more reliable than trying to automate around a match schedule, since halftime times vary.
Post-Match Wind-Down
After the final whistle, a gradual wind-down routine is a nice touch — particularly for late night fixtures. Lights shift from team colors back to warm amber over about five minutes, then continue dimming to 20–25% over the next 15 minutes. This eases the transition out of match-watching mode and makes it easier to wind down before sleeping.
Voice Command Shortcuts Worth Setting Up
A few voice shortcuts that are genuinely useful during play:
- “Goal!” → Flash lights twice in team color (Hue supports this through the flash effect in Routines)
- “Match mode” → Activate your full game-day scene
- “Lights up” → Raise to 60% neutral white for halftime
- “Night mode” → Shift to warm, dim settings for post-match
Choosing a Smart Home Ecosystem
The ecosystem you choose affects which products you can buy, how reliably everything works together, and what features are available long-term.
Philips Hue
Hue is the most established ecosystem in consumer smart lighting. The product range is extensive, the Zigbee protocol is reliable in ways that Wi-Fi-dependent systems sometimes aren’t, and the integration with Apple HomeKit, Google Home, and Amazon Alexa is seamless. The HDMI Sync Box is a Hue-exclusive product and remains unmatched for real-time screen sync.
The main downsides are cost and the requirement for a Bridge hub. The hub is a one-time purchase (around $99) but does add a step to the setup process.
If you want a setup that works reliably for years without tinkering, Hue is the right choice.
Govee
Govee punches considerably above its price bracket. The camera-based TV sync is a genuinely compelling product, the app is functional and well-maintained, and the product range covers most use cases. No hub is required — devices connect directly over Wi-Fi.
The limitation is that Govee’s ecosystem is less deep than Hue’s when it comes to third-party integrations and automation sophistication. It also relies entirely on Wi-Fi, which can introduce occasional connectivity hiccups in dense wireless environments.
For fans who want impressive features without heavy investment, Govee is an excellent starting point.
Nanoleaf
Nanoleaf makes visually distinctive modular light panels — hexagons, triangles, lines — that mount to walls and can be configured into patterns. They’re vibrant, eye-catching, and genuinely decorative.
Where Nanoleaf falls short is as a primary light source. The panels are accent lighting, not room lighting, and the per-panel cost adds up quickly for large installations. They work best as a secondary layer in a dedicated media room alongside other lighting.
Nanoleaf supports Thread and Matter, which positions it well for long-term smart home compatibility.
LIFX
LIFX bulbs are bright, accurate, and hub-free. They connect over Wi-Fi and offer excellent color rendering. For people who want to avoid the hub purchase but still want Hue-level quality in the bulbs themselves, LIFX is the closest alternative.
The product range is narrower than Hue, and the ecosystem integration is less comprehensive. But for someone who just wants a handful of great smart bulbs without building out a full system, LIFX delivers.
Budget Tiers: What You Can Build at Every Price Point
Smart lighting doesn’t require a large upfront commitment. Here’s a practical breakdown of what’s achievable at three spending levels.
Starter Setup: Under $100
A Govee TV Backlight kit with camera (~$55–$70) and a pair of Govee Smart Bulbs (~$14–$25) gets you further than most people expect. You’ll have real-time screen sync on the TV, team color scenes, voice control, and a schedule-able routine — the core of a smart sports viewing setup.
This is a worthwhile starting point even if you plan to upgrade later, because the TV backlight kit in particular makes an immediate and noticeable difference.
Mid-Range Setup: $250–$400
At this level you can mix ecosystems effectively. Four Philips Hue White and Color Ambiance bulbs with a Bridge (~$235-$250), one Govee TV Backlight 3 with Camera (~$69), and a Hue Play Light Bar (~$84-$99) gives you reliable, high-quality ambient room lighting plus camera-based screen sync.
This combination covers the living room comprehensively: the Hue bulbs handle ceiling and lamp lighting with precise color control and automation, the Hue Play bar extends the halo effect beyond the TV, and the Govee strip provides the real-time sync that makes sports watching genuinely immersive.
Premium Setup: $400–$800+
A full Philips Hue system with the HDMI Sync Box (~$335-385), Hue Gradient Lightstrip (~$165-$295), a Starter Kit with multiple bulbs (~$85), and Nanoleaf panels on the accent wall (~$150) creates a dedicated viewing environment where the entire room responds to what’s on screen.
At this level, the setup genuinely rivals what you’d find in a high-end home theater installation. The Sync Box alone — with its near-zero-latency full-room sync — makes sports watching feel like an event rather than a passive activity.
Frequently Asked Questions
Do I need a smart hub to get started?
No. Govee and LIFX products connect directly over Wi-Fi, no hub needed. A hub becomes relevant if you choose Philips Hue, where the Bridge is required. It’s a one-time purchase and the Zigbee reliability it provides is a genuine benefit over time.
Will the camera-based sync work with every streaming service?
Yes. Camera systems read the physical picture on screen, so they work regardless of whether you’re streaming via DAZN, Sky Sports, ESPN, a cable box, or an antenna. The camera doesn’t interact with the signal — it just watches the display.
Is screen-sync lighting distracting during a match?
Most people find it adds to the experience rather than distracting from it. The key is setting intensity correctly — starting at 40–50% and adjusting from there. At high intensity it can feel overwhelming; at moderate intensity it becomes atmospheric in a way you stop consciously noticing but would miss if it were gone.
What’s the right color temperature for sports watching at night?
Evening matches suit warmer light in the 2700–3000K range. This reduces visual fatigue, doesn’t interfere with sleep as much as cooler light, and creates a cozier atmosphere that works well for a later kick-off. For afternoon or daytime fixtures, 4000–5000K (neutral to cool white) better matches the natural light coming through windows.
Will smart lighting actually reduce eye strain or is that marketing?
The bias lighting component specifically does have a practical basis. Reducing the luminance contrast between the TV and the surrounding room measurably reduces the adaptation work your eyes have to do. It’s a well-established principle in display calibration and professional monitoring environments, not a feature invented for product packaging. The improvement is real, particularly during sessions lasting more than an hour.
Are LED smart bulbs energy efficient?
Considerably more so than incandescent alternatives — typically 75–80% lower energy consumption, with lifespans measured in tens of thousands of hours rather than thousands. Smart control compounds this because lights aren’t left running unintentionally.
Where to Go From Here
The best place to start is the TV backlight. It’s the single change that delivers the most immediate improvement to both atmosphere and eye comfort, and the camera-based kits from Govee make it accessible at a price point that’s easy to justify.
From there, adding smart bulbs in the overhead fixtures and a single light bar positioned beside the TV rounds out the setup into something genuinely tailored for sports watching.
Automation can come later — schedules and routines are easy to configure once you have the hardware in place, and they turn a collection of smart devices into a setup that feels genuinely considered.
The room you watch in matters. With a bit of attention to the lighting, it can match the occasion.